OCP
Contents
How to setup OCP environment
- Openshift Website
- Install OCP based on the official documents
- Red Hat OpenShift Local
- Install the cluster with Assisted Installer
- Install OCP with Balazs’ script
- Install a vm Single Node OpenShift (SNO)
- Install a vm control/worker cluster
- Install a bare mental cluster (Need iDRAC9)
Openshift Website
Here is the RedHat Hybird Cloud Console and latest install doc.
There are 2 ways to install the OCP for developer testing. One is via the official document. Another is use Balazs’ script.
Install OCP via the official doc
Red Hat OpenShift Local
Red Hat OpenShift Local brings a minimal OpenShift Container Platform 4 cluster and Podman container runtime to your local computer. These runtimes provide minimal environments for development and testing purposes. Red Hat OpenShift Local is mainly targeted at running on developers’ desktops.
The Local installer need to run as normal user. So we should add the user
to sudo group. We also need to set the systemctl --user permission.
First, Run as root and set the user permission
| |
Now su to test uer and start setup
| |
If you want to remove the local openshift, just run crc delete
If you installed the openshift on a remote server. You can install haproxy and dnsmasq to access the web console.
Install OpenShift on a single node (SNO)
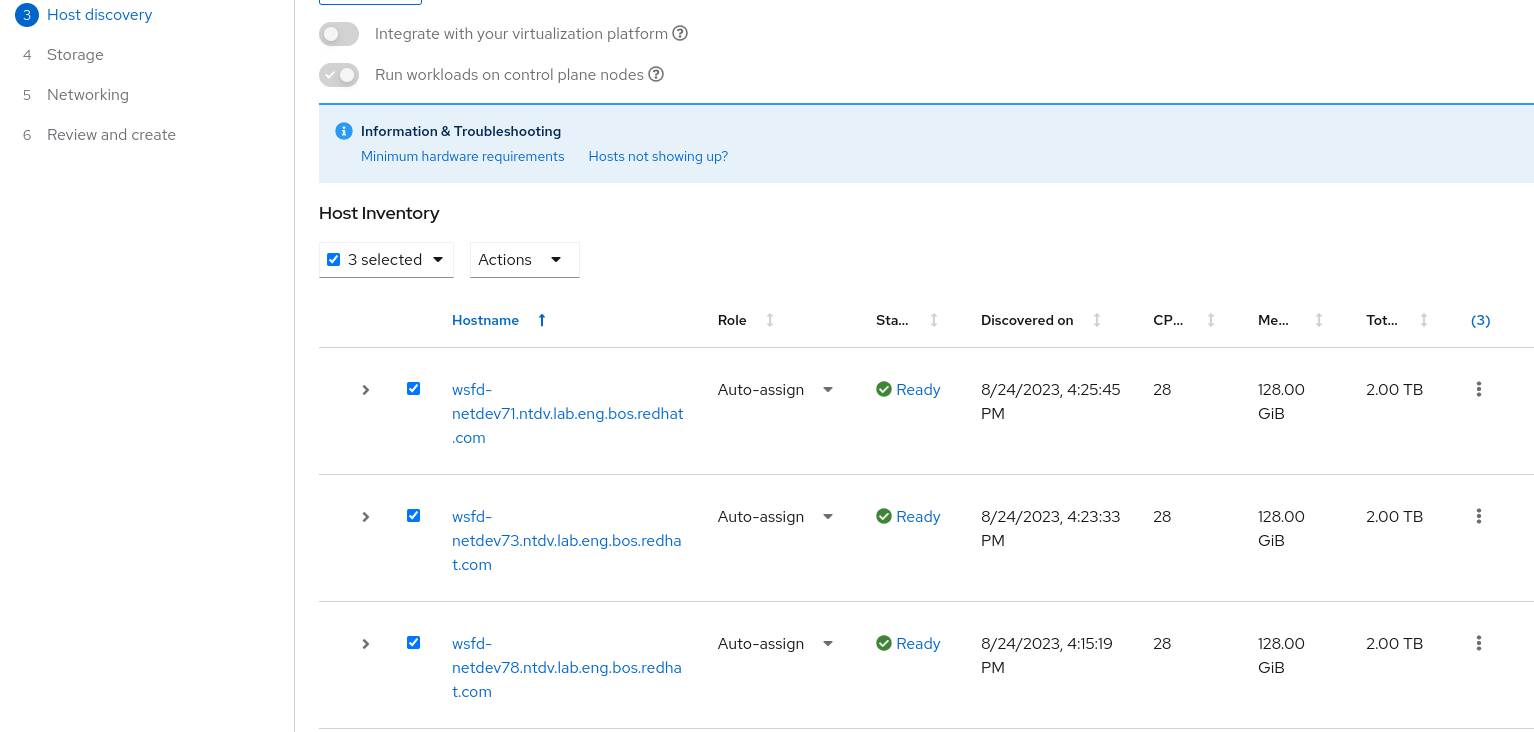
You can install single-node OpenShift (SNO) using the web-based Assisted Installer and a discovery ISO that you generate using the Assisted Installer.
Here is the process:
- On the administration host, open a browser and navigate to Red Hat OpenShift Cluster Manager.
- Click
Create Clusterto create a new cluster. - In the
Cluster namefield, enter a name for the cluster. - In the
Base domainfield, enter a base domain. For example:example.com - Select
Install single node OpenShift (SNO)and complete the rest of the wizard steps. Download the discovery ISO.
After download the discovery ISO. We need to attach the RHCOS discovery ISO to the target host and configure the boot drive order. If you are using your local machines, you can do this manually. If you are using a beaker machine. You can boot from an HTTP-hosted ISO image using the Redfish API.
Here we will take DELL’s iDRAC control pannel as example. In beaker, each machine has a remote access controller.
And the IP address is it’s own IP + 1. For example, the wsfd-netdev78.ntdv.lab.eng.bos.redhat.com's IP address
is 10.19.188.161. Then it’s iDRAC address will be 10.19.188.162. The default admin password is calvin.
After download the installation ISO and Copy the ISO file to an HTTP server accessible in your network.
We can insert the ISO to target host and set the boot order. With the idrac_setup.sh tool, you can just
sed 's#IMAGE_LINK#your_iso_link#' test.sh./idrac_setup.sh start $your_bmc_ip./idrac_setup.sh reboot $your_bmc_ipor boot/reboot via beaker power page- Monitor the installation’s progress. Watch the cluster events.
- reset the iDRAC setting via
./idrac_setup.sh reset $your_bmc_ip
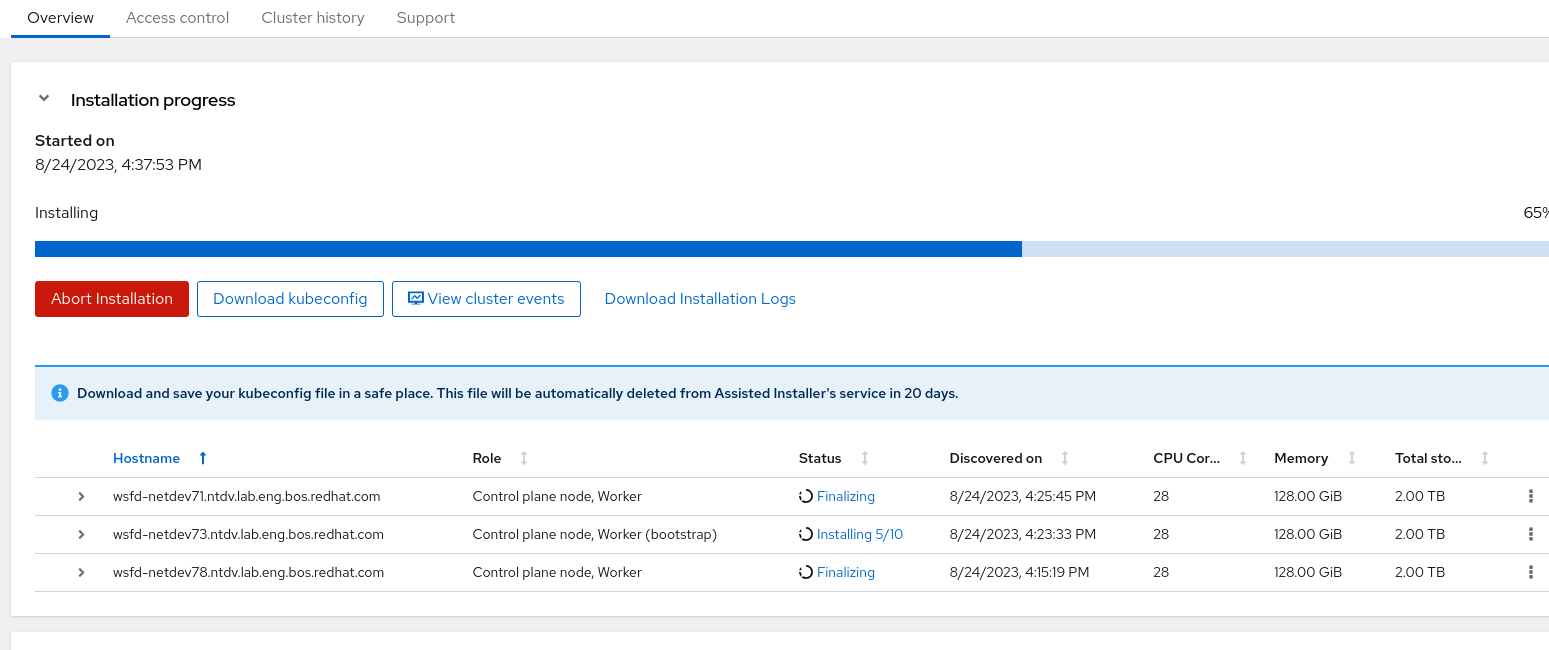
After installation, in the Overview page, you can open the Web Console URL
and login the cluster with kubeadmin. If you can’t login, you can use external
DNS server or local configuration to resolve its hostname.
Install OpenShift clusters on bare metal
The steps almost the same with the way we install SNO. The only differences are
- Do not select
Install single node OpenShift (SNO)when create the cluster - We need at least 3 Control plane nodes.
- We can add more workers after that.
WARN: when set the ingress/API IP, we need to choose unused IP addresses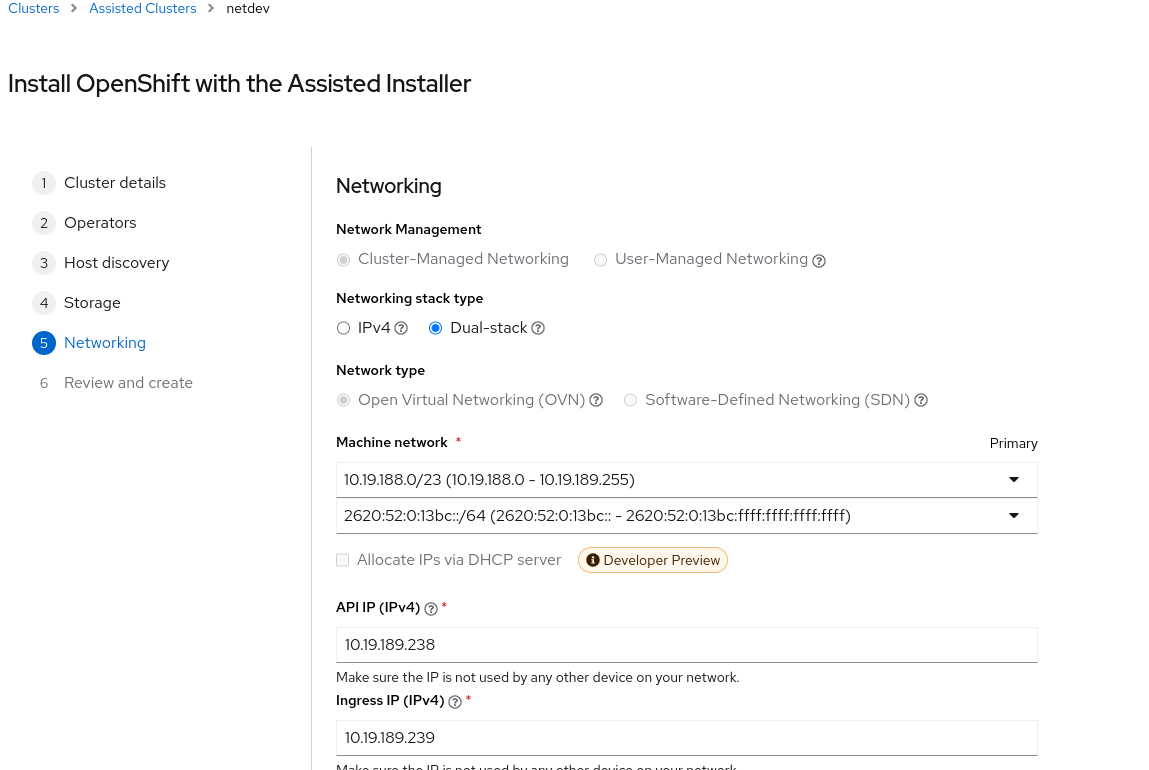
In the web console overview page you can see the install progress.
Install OCP with Balazs’ script
Apart from the official way, which need some manually works, on the other hand, it is more stable. We can use Balazs’ script. With this script we can setup the OCP environment automatically.
Just follow up the README steps you setup the OCP env easily. The down side is some OCP version may not stable. And require iDRAC9 if you want to install OCP on bare mental machines.
On the other hand, it’s recommend to install the OCP on VMs for testing, which would save more resources.
Some TIPs
How to login the cluster with ssh
There is no way to login cluster with root directly. We can use a special user core (which has sudo permission) to login CoreOS.
How to get the kubeadmin password.
With RedHat Hybird Cloud Console you can find it from the Overview page.
If you are using Balazs’ script. It will start a assisted service(with port 8080)
on the server you are running. After open the page, you can find the password.
How to open the web console.
With RedHat Hybird Cloud Console you need to edit your DNS or hosts file.
With Balazs’ script, you need to add the following entries to hosts file
| |
and run sshuttle to forward the DNS requests.
| |
Then you can open console-openshift-console.apps.vm.redhat.com on your browser.
Author Hangbin Liu
LastMod 2023-08-25 (33e705c)